3.1 KiB
1-Up Hackpad

My 1-Up Hackpad has 7 keys: 2 rows of 3, plus one extra key that will look like Mario hitting a question mark block. It also has a rotary encoder and a 128x32 OLED screen.
Features:
- 7 Keys
- 2 Part Case
- Mario Design on Case
- 128x32 OLED Screen
- Rotary Encoder
- Reverse Neopixels to light up keys!
- Powered by a XIAO RP2040
Inspirtation
I really love the Super Mario world so used that to design the aesthetics of my Hackpad. When hitting the 7th key, it is as if Mario is hitting the question mark block. I wonder what will happen...
Challenges
I had some difficulties figuring out how to secure my Hackpad into the case so that it will be stable and not move around. With my prior understanding of Fusion360, I was able to solve this issue. I had also never used KMK or QMK before. I tried QMK but then eventually decided that KMK was better and used the extensive documentation they have to understand how to use it.
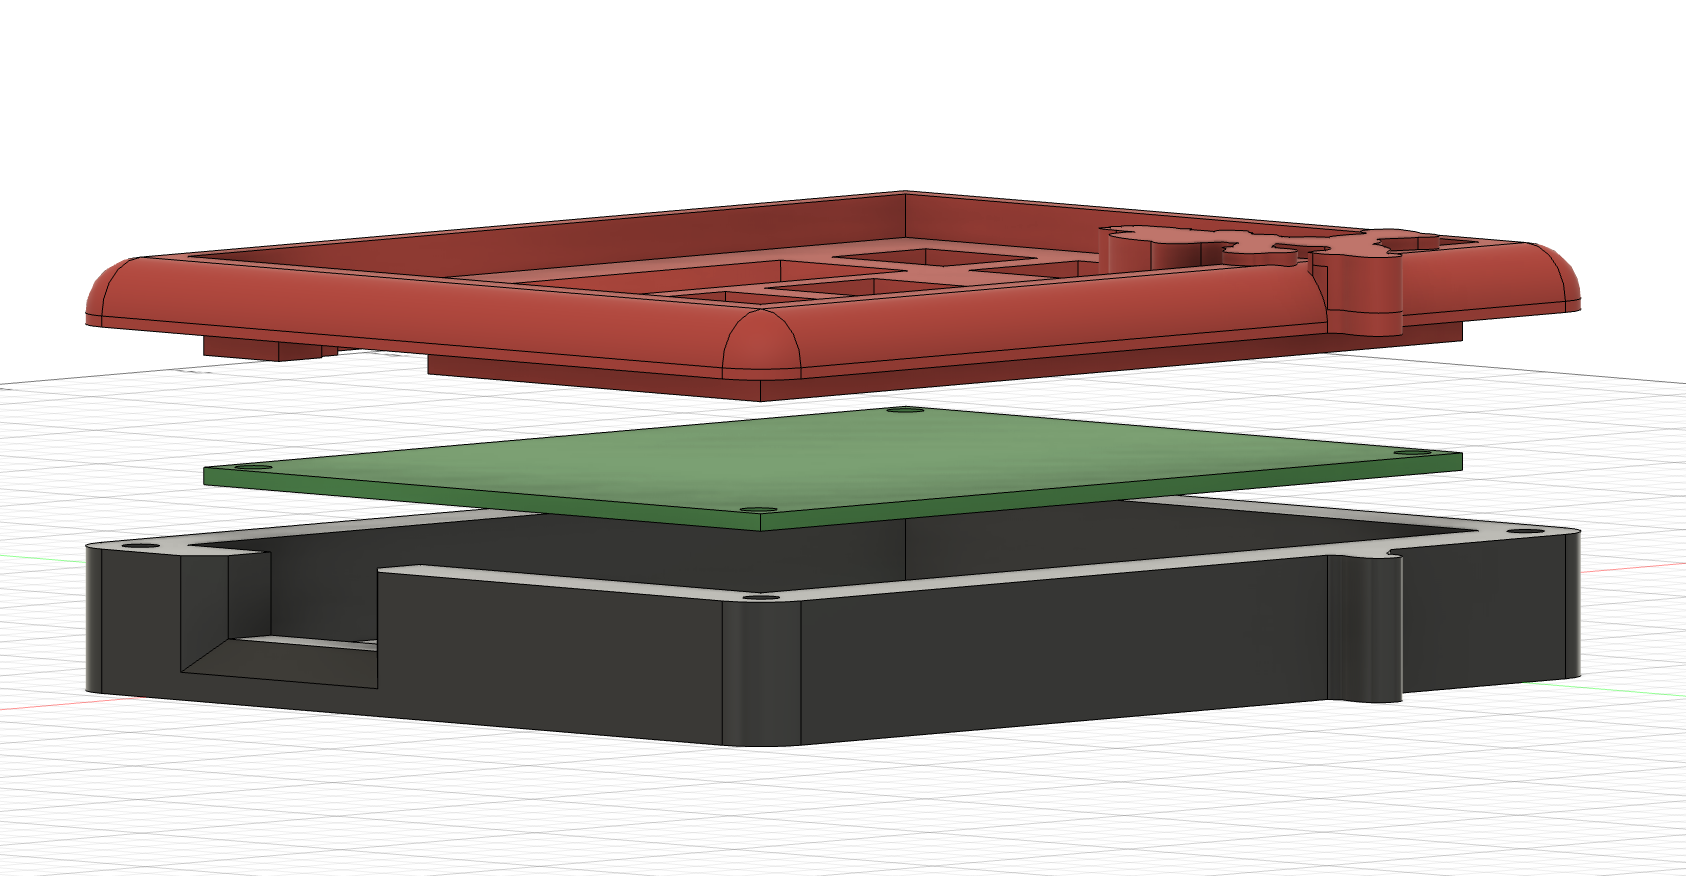
CAD:
How it Works
The case was made in Fusion360, using DXF files of the PCB to ensure accurate measurements for all parts. The case is secured together with 4 M3 screws, and the PCB is secured to the lid using 4 M3 screws.
Parts
There are two parts to the case, the bottom and the top. The bottom is where everthing is housed, and the top secures the PCB in place and has holes for the various switches, encoder, and OLED screen.
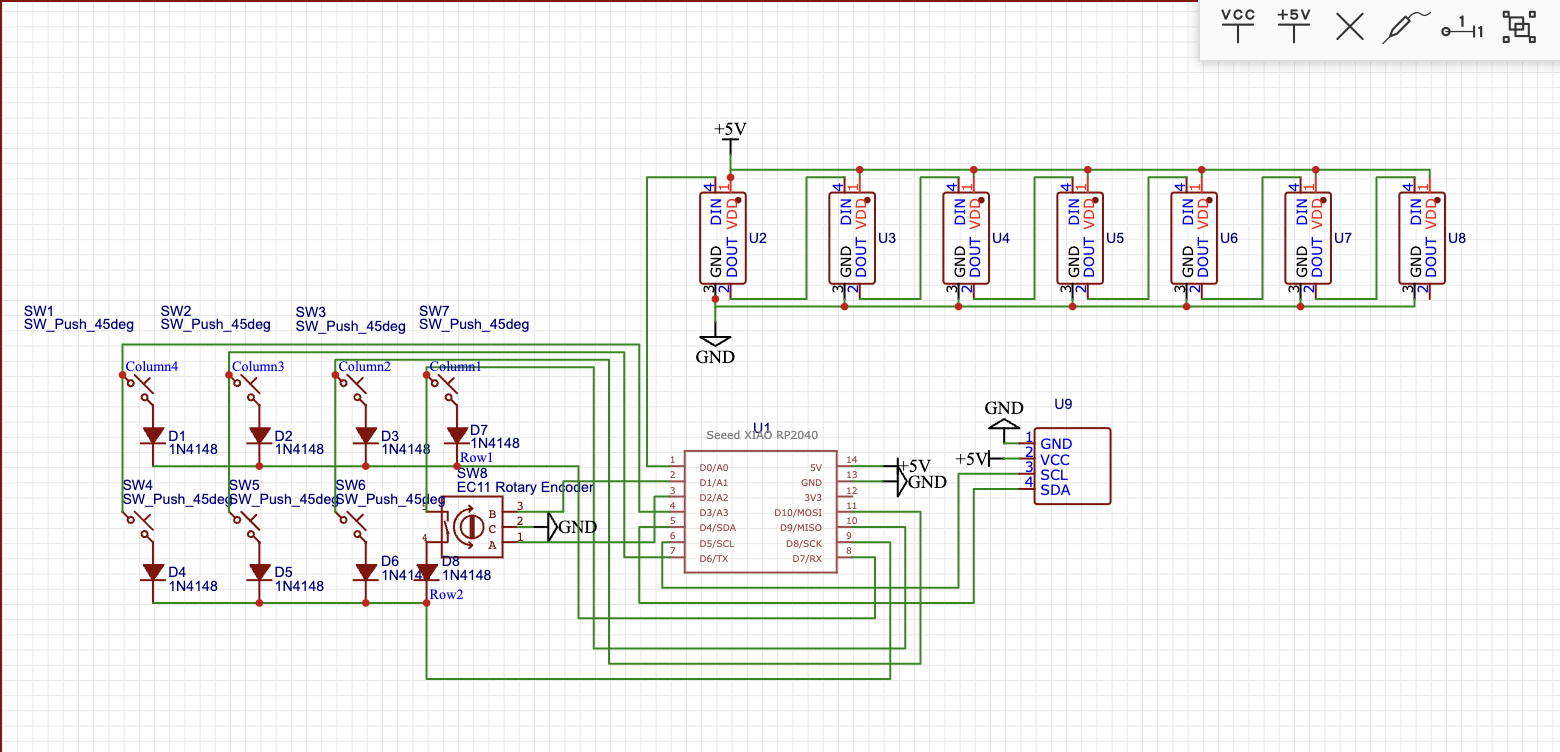
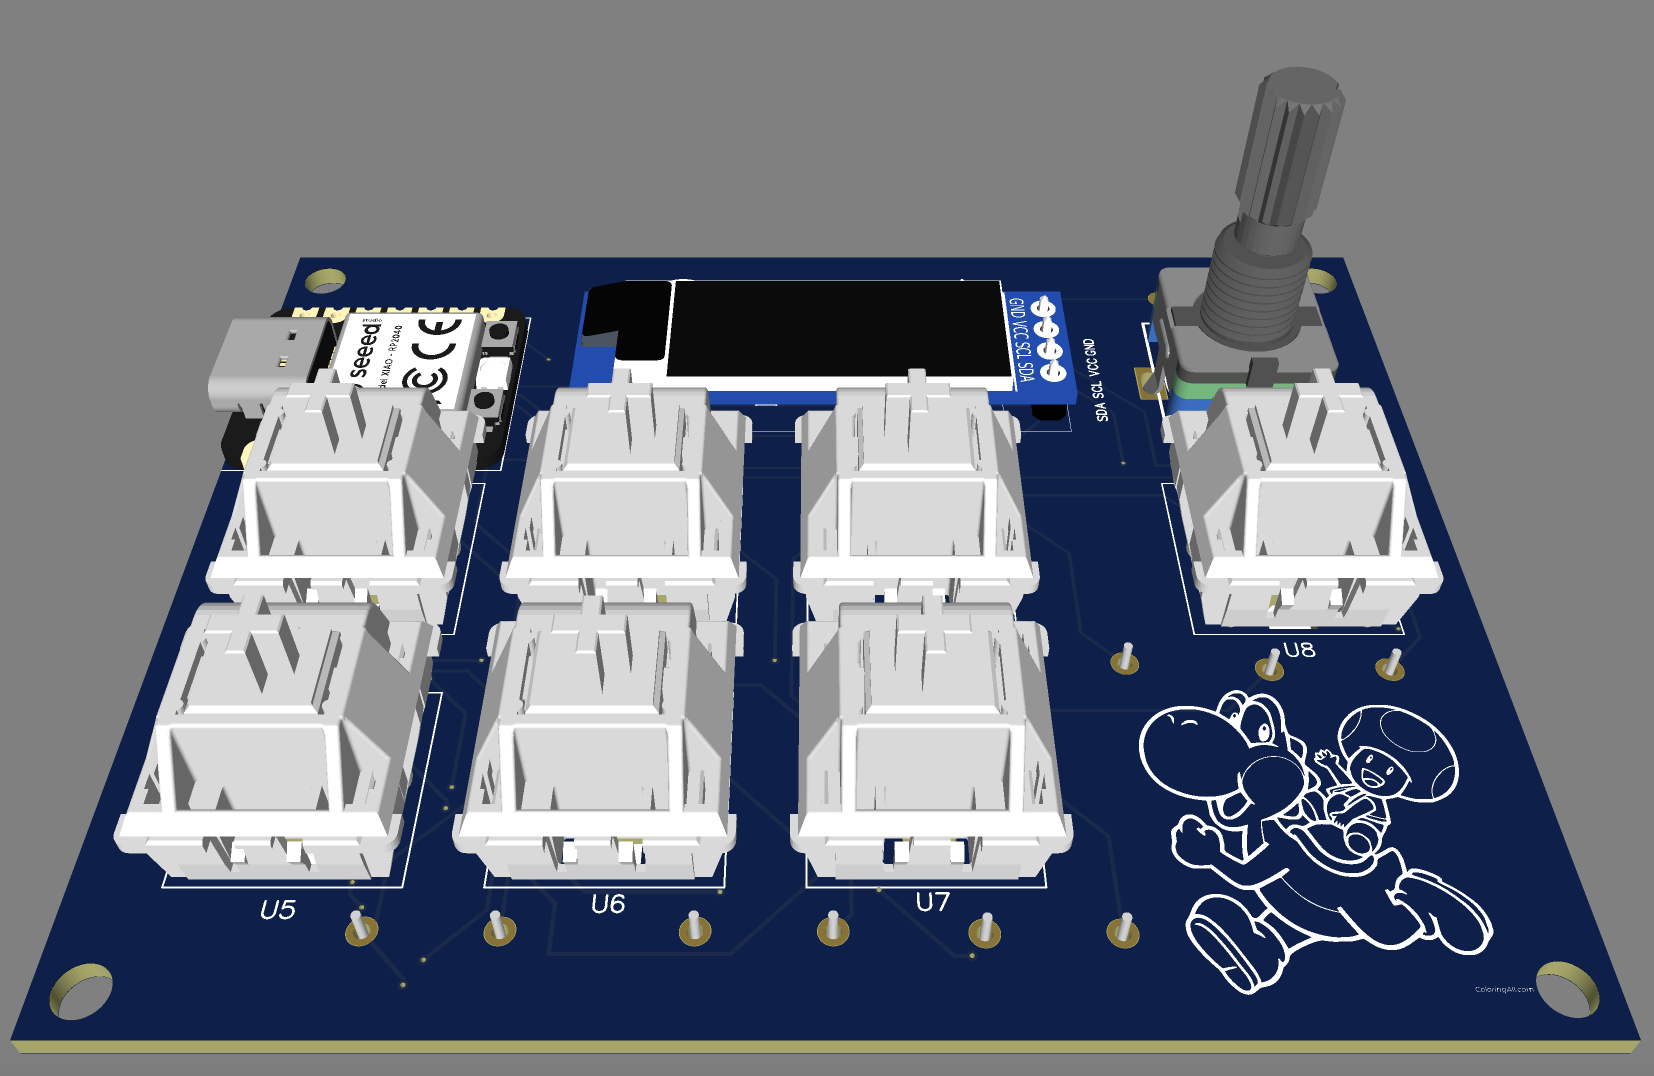
PCB:
I made my PCB in EasyEDA and used a Matrix for all the key inputs, plus the rotary encoder button. I also added images to the silkscreen to give it a bit more personality!
Schematic
PCB
(yes my wiring is super messy, sorry)

3D View
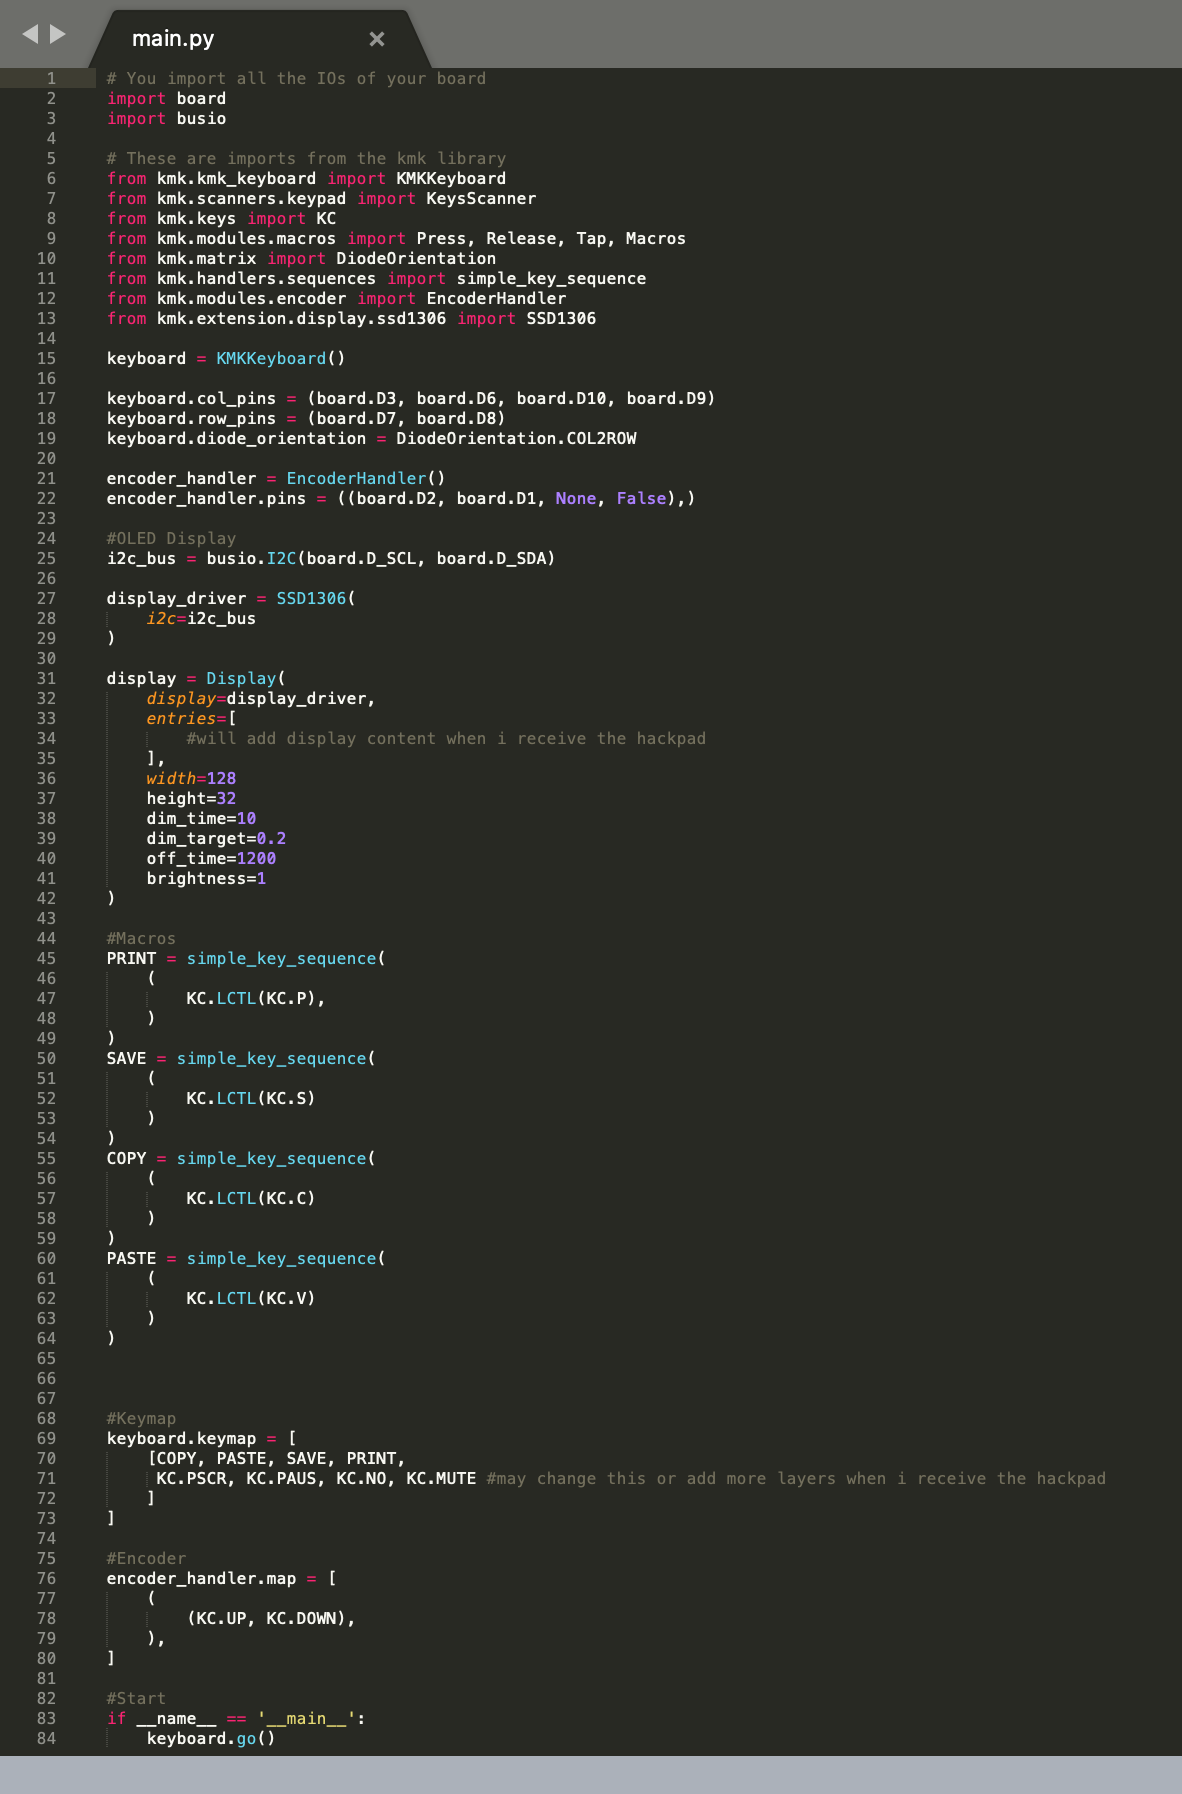
Firmware:
- Map all Inputs for Keys
- Map all Macros for Keys
- Map Rotary Encoder + Encoder Button
- Map OLED Screen
- Add Images for OLED Screen
- Map LED Inputs for Neopixels
I used KMK for my firmware. I mapped the keys to different Macros that I may change or add to later. I mapped the rotary encoder and encoder button to volume up, volume down, and mute. The screen is mapped and configured but I have not added images to it yet. I also need to decide when I want the neopixels to come on and turn off under the keys.
BOM:
- 1 x XIAO RP2040
- 8 x Through-hole 1N4148 Diodes
- 7 x Cherry MX Switches (clear if possible)
- 1 x EC11 Rotary Encoder + Knob
- 1 x 0.91" 128x32 OLED Display
- 7 x Blank DSA Keycaps (all white if possible, or at least 1 white)
- 7 x Reverse Mount SK6812 MINI-E LEDs
- 8 x M3x16mm Screws
- 4 x M3 Hex Nuts
- 12 x M3x5mx4mm Heatset Inserts
- 3D Printed Case (red for top, black for bottom, as shown in image)